Showing posts with label before photos. Show all posts

Wednesday, February 19, 2014

New Outlets Deliver Shocking Results!

No, I didn't zap myself but it's shocking what a difference this simple update makes. Before I did anything else, I decided to update the light switch, outlets and covers in the room. The originals were brown or black and the outlets didn't have a hole for grounded plugs. The outlet covers were painted over which sealed them to the wall. I had to get a screwdriver behind it and pry it off.


When I tried to pry the next cover off, it broke the outlet completely.

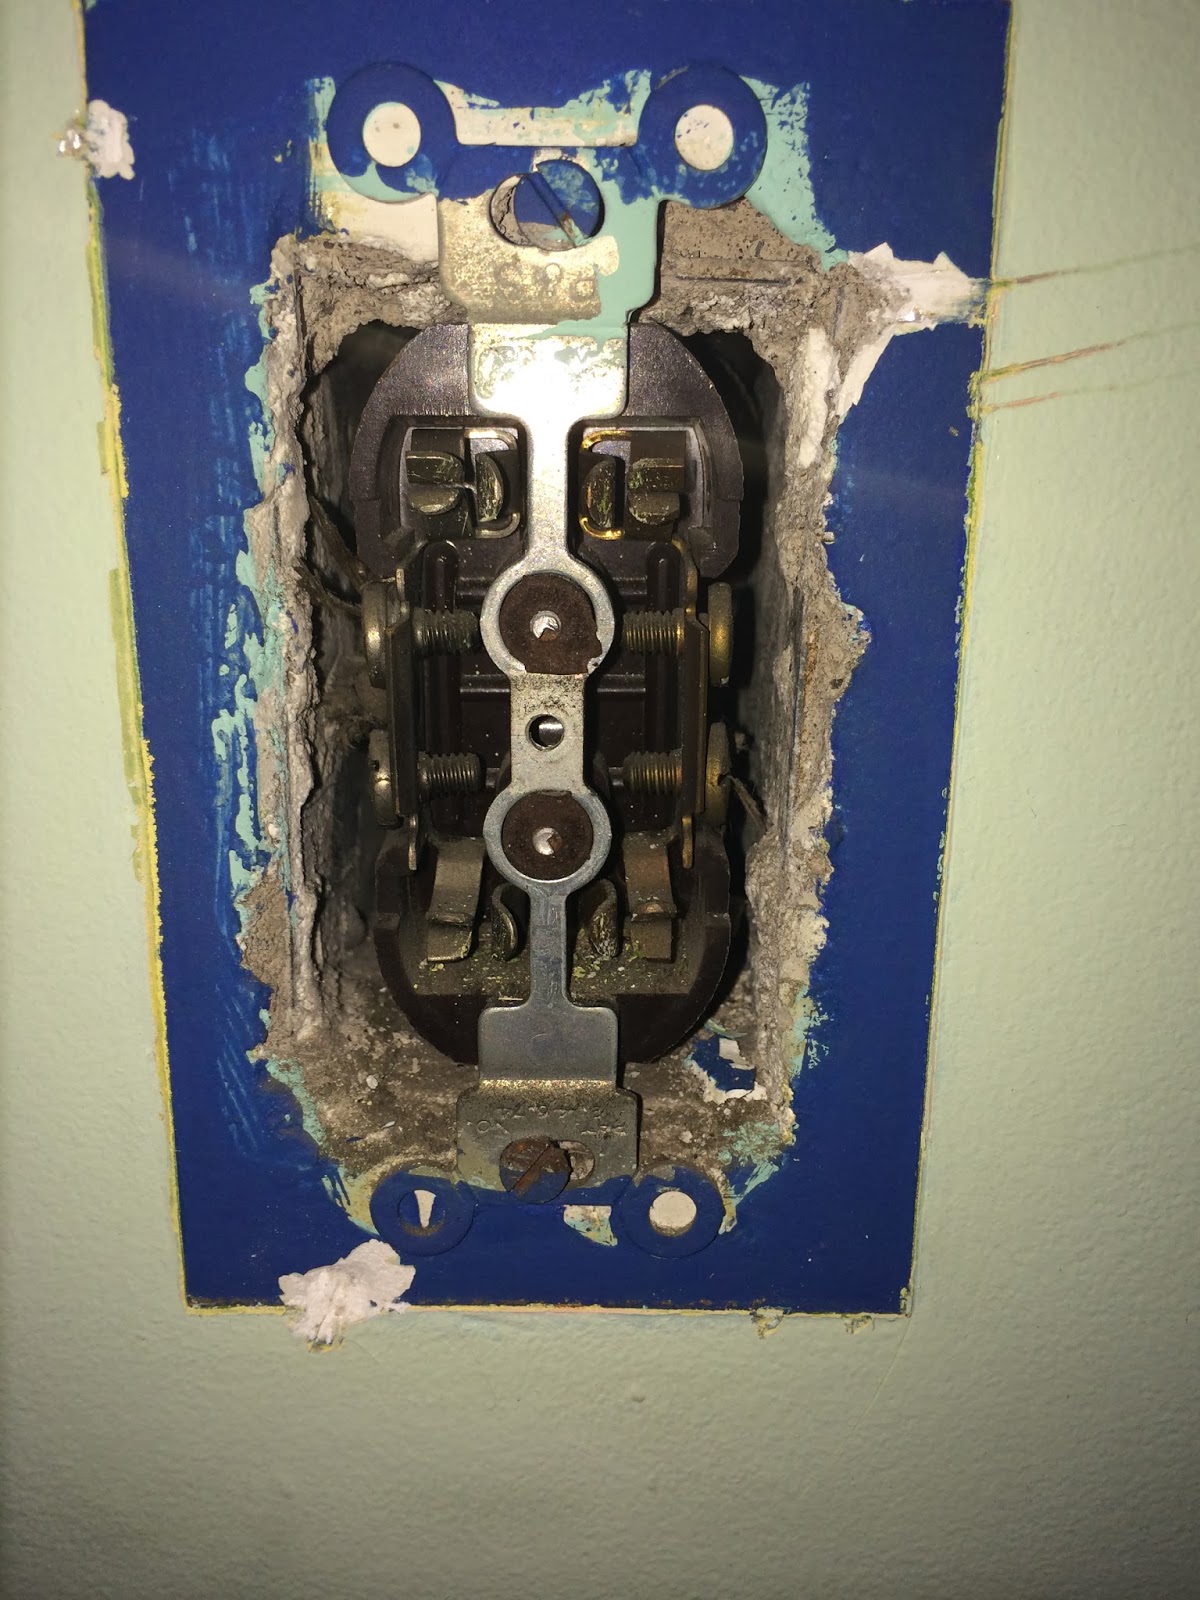

The light switch was an old mercury type and the light switch cover...well, grandma got her hands on that one.

The black switch just looks like a dark hole in the middle of the cover.

I grabbed a pair of pliers, Phillips and flat head screwdrivers, and borrowed a Receptacle Tester from dad (which is a great tool to add to your electrical arsenal. I plan to get one of my own.) I picked up 4 new outlets and a new switch at Lowes. I also grabbed a box of 50 Grounding Pigtails at Home Depot for $16 (enough to do the whole house.) . Once I had all my supplies and I shut the power off, I was able to get down to business. Keep in mind I'm not an electrician but a home wiring guide from Home Depot is a good thing to pick up and read to get a basic understanding before doing anything around your home.

Replacing basic outlets and switches is relatively easy. First MAKE SURE THE POWER IS OFF! Then, take off the cover and remove the 2 screws holding the receptacle to the electrical box inside the wall. Pull it out of the wall to expose the wires attached to the receptacle. Remember that the white wire always goes to the silver screw and the black wire goes to the brass screw. Black to Brass will save your ass! It was easy to pop them off the old outlets by unscrewing the brass and silver screws and putting them onto the new ones. Since the new outlets have the ground prong hole, they needed to be grounded properly. The grounding pigtail goes to the green screw on the outlet and the other end of the pigtail gets screwed into one of the holes in the back of the electrical box in the wall. The box is already grounded so this just connects the outlet to the box to ground it. It's important to remember to wrap the wire clockwise around the screw so when you tighten it, it doesn't end up pushing the wire off the screw. When the outlet is rewired and screwed back into the wall, plug the receptacle tester into the outlet and then turn the power back on. The tester will tell you if you have wired your outlet properly by displaying pairs of lights. Match the lights with the guide on the tester. If something isn't correct, it will tell you how to correct it. Obviously Grandpa didn't have a receptacle tester because the only outlet he updated in this room since the house was built (for the air conditioner) gave me error lights. I fixed that one while I was at it.

Once everything was all finished, I put new covers on. I picked these up at Lowes when I got the outlets and switch.

Again, unsure why Blogger keeps graying these out, but they are white.

I'm so happy with how these look. I know they're just outlets and a switch and they'll all be behind the furniture but it makes the room look so refreshed and updated.


A great, inexpensive way to update a room!

Tuesday, February 11, 2014

No, This Isn't a Cave.

When I last wrote about this room, I had shown the before photos and a couple progress photos where Grandma and I had emptied the room of all her knick-knacks and furniture.


The first thing I did was give all the woodwork a good sanding to remove the glossy finish and then I wiped it all down with liquid deglosser to clean off all the dust and soften anything remaining in the cracks that didn't get sanded well. Then I removed the 10,000 nails in the walls (OK so maybe it wasn't that many, but she had a lot of stuff on the walls.) I Spackled the holes and once that was dry I sanded and repeated. That gets a nice, smooth, even surface which is extremely necessary because any imperfection in the wall surface is amplified by dark colored paint.

Benjamin Moore Old Navy
Yup, dark paint.  Benjamin Moore's Old Navy to be exact! I had seen a room on Houzz with navy above white board and batten that I instantly fell in love with. It had short high windows like this room which gets a lot of light so it seemed like a perfectly suited color scheme to use here. I had Valspar Ultra color matched at Lowes in an Eggshell finish.

Benjamin Moore Monterey White
For some reason Blogger keeps graying out this photo. Click here to see it. 
I'm not typically a fan of using the same color on the walls as the ceiling. Grandma says that's the way to do it because "white ceilings are old fashioned," which is ridiculous, because there's a time and a place for white vs. colored ceilings. I love a white ceiling in most cases and this is one of them because Old Navy on the ceiling and the walls would make this room feel like a cave. The ceiling, trim, and the lower wall will be Monterey White by Benjamin Moore as well. I got a gallon of Valspar Ultra color matched in eggshell and a quart in semi gloss for the trim. Normally the ceiling is a Flat finish, but because I had to buy 2 gallons and a quart of paint for one room, I used the eggshell on the ceiling too. (Big spender here.)


Once all the surfaces were prepped, I started cutting in with white around the ceiling, lower windows, lower corners of the room and the floor. I didn't worry about getting paint on the trim or upper walls because they would be painted over with navy or semigloss white later. Then I painted the ceiling and lower walls. I figured I'd put the chair rail molding just above the window sills so i just eyeballed the height of the white all around the room.


Once 2 coats had dried, I measured the appropriate length down from the ceiling in 3 foot increments all around the room and marked it with a pencil. Then, with a yardstick, I connected the dots so I would have a nice straight line to tape along. I knew the line would be covered with the molding, but I wanted to keep it somewhat straight and the tape was a bright, bold visual aid to help me from going too low with the navy blue.


After cutting in around the upper windows, doors, and corners of the walls, I started painting the upper walls. This deep navy blue took 3 coats to get full coverage.


I didn't paint up to the ceiling because I used a paint edger.


That was when grandma suggested crown molding. I had thought about it before she suggested it, and the only reason I didn't do it was because I couldn't afford it and I figured I could always add it later. Since she offered to buy it, I was happy to be able to do it sooner rather than later. The walls are finished so stay tuned for more about the bedroom.

Friday, February 7, 2014

House Tour - Kitchen, Bathroom & Master Bedroom

Did you look into the kitchen in the last post? I told you to save that so-sweet-it's-sour eye candy for a dedicated post and here it is. Behold the kitchen in all it's pink glory!

The kitchen cabinets were a wedding gift to my grandma from her mother.

I'm not sure why the oven is open and the light is on...

Before these appliances, there were avocado green ones but I'm not sure what was there before that.

There was a stainless steel sink before this one. More Precious Moments on the shelves here. The door on the left leads to the back yard.

The lower cabinets have pull-out slider shelves. Very ahead of the times! The narrow cabinet on the right has a slide-out towel bar.

Grandma intentionally had the soffit made shorter than the cabinets. She definitely had a vision. She used an old wooden cream cheese box like the one below and covered it with wallpaper to use as a built-in planter.
This room was rewallpapered on 10/27/1978 with the paper you see here. Before this was a geometric 3D square patterned paper. 


She's a fan of Raggedy Ann and Andy and this is just where SOME of the collection lives.

This side of the kitchen next to the fridge has more slide out lower cabinets. The center cabinet has a shelf that swings out and up & locks at counter height which holds the mixer. I forgot to take a photo of the insides of the lower cabinets. 

She has an interesting way of storing her dishware. but she doesn't use it much so it's not inconvenient to keep it this way.

Some more Raggedy Ann stuff and her handpainted eggs. She did a lot of ceramic work and was very skilled with a paintbrush.


She had always wanted a range hood but grandpa installed this exhaust fan instead. She hates it. She kept the circular cutout from this fan which is what I scanned to to make the background of this blog so look to the left or right to see the countertop and backsplash detail. The door on the right of the fridge leads to the basement.

The floor is standard linoleum floor tiles and the star was custom inlaid from larger pieces of the same kind of tiles.


Now we can head back down the hallway and check out the bathroom.


While I'm not fond of the colors in here, I do love this bathroom. I think the tub is so cool and the room is large for a 50s bathroom. 


Two of the things I hate most about this room are the lighting and the mirror but the mirror is probably what makes the room feel so much more spacious. I hate fluorescent lighting with a passion along with the weird floating soffit that contains the light.  


The built in linen storage is great. The bottom cabinet has a laundry chute on one side.

Now the last room on this floor, the master bedroom.


SO...MUCH...PINK.

The Case between the door and the closet is Grandma's dollhouse. She made it in the 70s. I'll post pictures of that someday.


Hope you enjoyed the first floor phase of the house tour! I still have to take photos of the basement where grandma lives now and the second floor bedroom and attic space which is currently a mess.