Showing posts with label grandma. Show all posts

Sunday, March 2, 2014

Dumpster Diving & Savings Finding For Bedroom Furnishings

I gave some background about the bedroom furniture in the first post about this room.


This headboard and nightstand and mirror belonged to grandma's nephew. He was throwing it out when he moved. Grandma took them and they've been sitting in the garage. My mom had the same bedroom set and was getting rid of hers at the same time. Luckily, out of pure laziness, we hadn't thrown out one of her nightstands yet so I'll have a matching set of furniture for free. Neither of the dressers from the original sets were saved, just one of the mirrors.


I'm not crazy about this Ikea lamp but grandma just put it there temporarily.


The dresser is a family heirloom. It was my other grandmother's when she was little and then it was my mom's when she was a kid. When I was born, dad refinished it and I've had it ever since. It matches the mirror very well (not so much in the picture above though...) and luckily the mirror is just the right width to fit on top of the dresser.


Grandma had the blanket rack in this room originally so I just kept it. The photo is one of the cruise ship docks in Lake George NY. I had an 8x10 printed at CVS and the pre-matted frame was $6 at The Christmas Tree Shop.


The comforter and sheet set is from Bed Bath & Beyond. It was originally $80 but I used a 20% off coupon. The navy shams in the back are from Kmart and I got a tailored navy bed skirt from Wayfair.com but It's not on the bed yet. The 3 throw pillows were grandma's. The striped one is from Ikea but I don't know where she got the 2 white ones.


It's a full size bed but the headboard is a queen size. Instead of trying to make some contraption to attach the headboard to the bed frame, I just bolted it to the wall.


I got this shabby trunk at The Christmas Tree Shop too. It was originally $50 but on clearance I got it for $12.


I swiped this plant stand from the living room and grandma was happy to let me keep it after seeing how perfect it looks in this little corner. The Partylite candle sconce was given to me by my aunt. I'm planning to paint it but I'm not sure how yet. I might do a brushed nickel or maybe paint the top half white and leave the bottom black.


A nice shot of the finished crown molding.


I walked down the lamp aisle at Lowes 3 times on different days and I didn't see anything I liked. Then I was at a different Lowes and I saw this lamp and that was it! My lighting search was over. These are the lamp bases and shades that are sold separately to mix and match and at my regular Lowes this combo was not on display so I didn't really notice them separately. I then spent a day driving to all the different Lowes in my area trying to make 2 of these lamps because none of them had 2 lamps and 2 shades. One store did have 2 shades, but one of them was unwrapped and dirty.
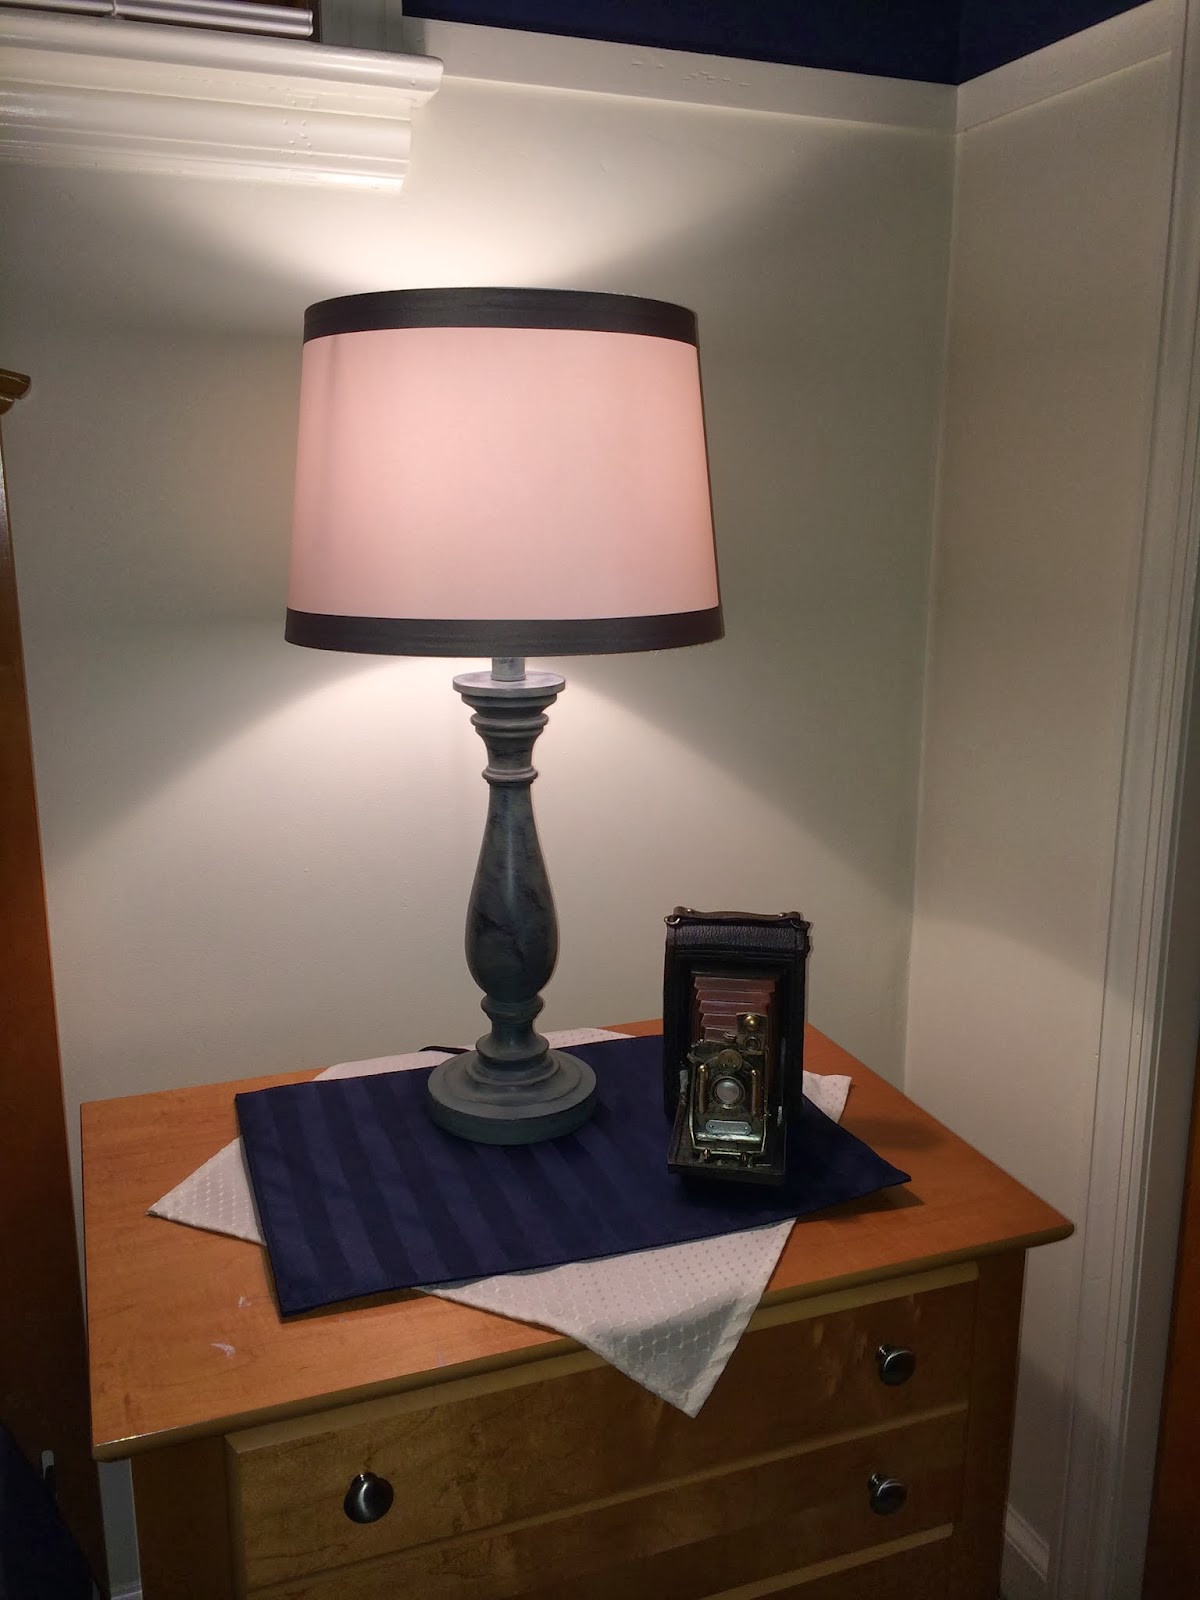

The old time camera is made of resin from one of those catalogs like ABC or Collections Inc.


I knew that the nightstand I'd be bringing from mom's house had water damage to the top. I Picked up these navy placemats and creamy white cloth napkins to cover the damage and add some interest to the nightstands.


This neat little pot is also from The Christmas Tree Shop. $6.


I'm not usually a huge fan of Ikea but I love these little plastic potted plants. They look very realistic. It sat a little low in the pot but was the perfect amount of foliage and just needed a little boost in the bottom from an empty yogurt cup.


This really nice Heywood Wakefield table is another curbside treasure. Grandma's sister found it near the dumpster of her building and grabbed it. It was perfect for my TV so grandma put 2 placemats on top and I asked her for the neat tealight vase that she had downstairs.

I still need to get the curtains back. They are being hemmed by a friend of my mine and I asked her to add a stripe of navy ribbon to the bottoms. This room is pretty much finished for now.

Friday, February 21, 2014

Time To Get Blinded

In the last post I said that if I had gotten rid of the cornices, I would have regretted it. Let me explain why. I knew that I wanted white 2" wood blinds on the windows in here. I love the look of them but I had 3 required marks that needed to be met.
1. They had to be room-darkening because I need absolute, complete darkness to sleep.
2. They had to be the right size because these windows have odd dimensions.
3. They couldn't be too expensive which is something I feared given the odd dimensions, I thought I might have to get custom made ones.

Fortunately I found ones that met all the requirements at Walmart. I picked up four 39" Better Homes and Gardens White 2" Faux Wood Blinds for a total of $120. Not bad.


I was all ready to hang them when I realized that they couldn't be mounted inside the window frame as planned. The windows are side-sliding privacy windows and the can be removed to clean them or replace the screen/storm windows. I wouldn't be able to take out the windows with the blinds mounted inside the window frame. I would have to mount them outside the window on the trim above but another problem, I had already put the cornices back up and I didn't want to take them down and rehang them not to mention make holes in the trim. I decided to mount the blinds right to the underside of the cornice.


These windows are very short so there were a couple inches of unused slats resting on the window sill. Once they were mounted, I followed the directions to remove the extras, something I've never done before. It really makes a big difference and it's nice that when they are down, you don't have to worry about making sure each end is straight or keeping the excess from falling off the window sill.


A happy accident, the blinds mounted to the cornice completely cover the air conditioner and look completely normal when closed. No bulging. Normally blinds mounted outside the frame are supposed to extend past the window and cover all of the window trim on the sides. Grandma picked up some great curtain panels that I actually like which will go on the ends and in the middle and cover the gaps. The room is starting to come together.

Thursday, February 20, 2014

A New Bedroom With All The Trimmings

After my Adventure in Electrical was over, I turned my attention back to the trim. I had already sanded and deglossed all the existing trim so that was ready for paint. Grandma and I mutually agreed that the doors and windows shouldn't be painted. I didn't ask her what her reason for that decision was but for me, I just didn't want to do all the extra sanding and painting. I also like the look of stained wood doors with white trim and it worked well here because it's a similar tone to the wood furniture I garbage picked inherited.

I carefully taped the walls around all the windows and removed the door and the hinges  I broke out the can of semigloss Monterey White and got to work.


I gave all the trim 2 coats. While I was at it, I painted the cornices I took down before. I personally don't want them but I have to choose my battles here and I know grandma would insist they be put back up. At least she allowed me to paint them.


After the trim and cornices were dry, I rehung them above the windows. Not bad and I'd soon come to realize I'd regret getting rid of them if I did.

By this time I was ready to turn my attention to the molding separating the lower and upper walls. I used pre-primed lattice strips. They’re nice because they are thin, light weight, and cheap! I measured and cut the strips using the miter saw dad gave me when he got a new one. Then I applied a nice squiggle of adhesive caulk to the back of each piece and stuck it to the wall. Once they were stuck up and straightened out with a level, I used my air nailer to completely mangle their nice smooth surfaces. (I'm covering the good, the bad and the ugly here) Turns out that they really don't work well with lath and plaster/cement walls and I should have just used liquid nails to glue them up. I did the same sort of surface marring destruction to the crown molding and spent an extra day caulking all the holes and dents and making them look pretty again. This is a learning experience and I definitely learned here. Once all the edges and corners and cracks and holes were caulked, smooth, and dry, I taped and painted them with the semigloss white. I also replaced the scalloped trim above the closet door with a wider piece of the lattice trim.


This is the only photo I have that shows the existing trim, chair rail, and the crown molding. I really need to get better at remembering to take more "progress" photos. More to come on the bedroom so stay tuned.

Wednesday, February 19, 2014

New Outlets Deliver Shocking Results!

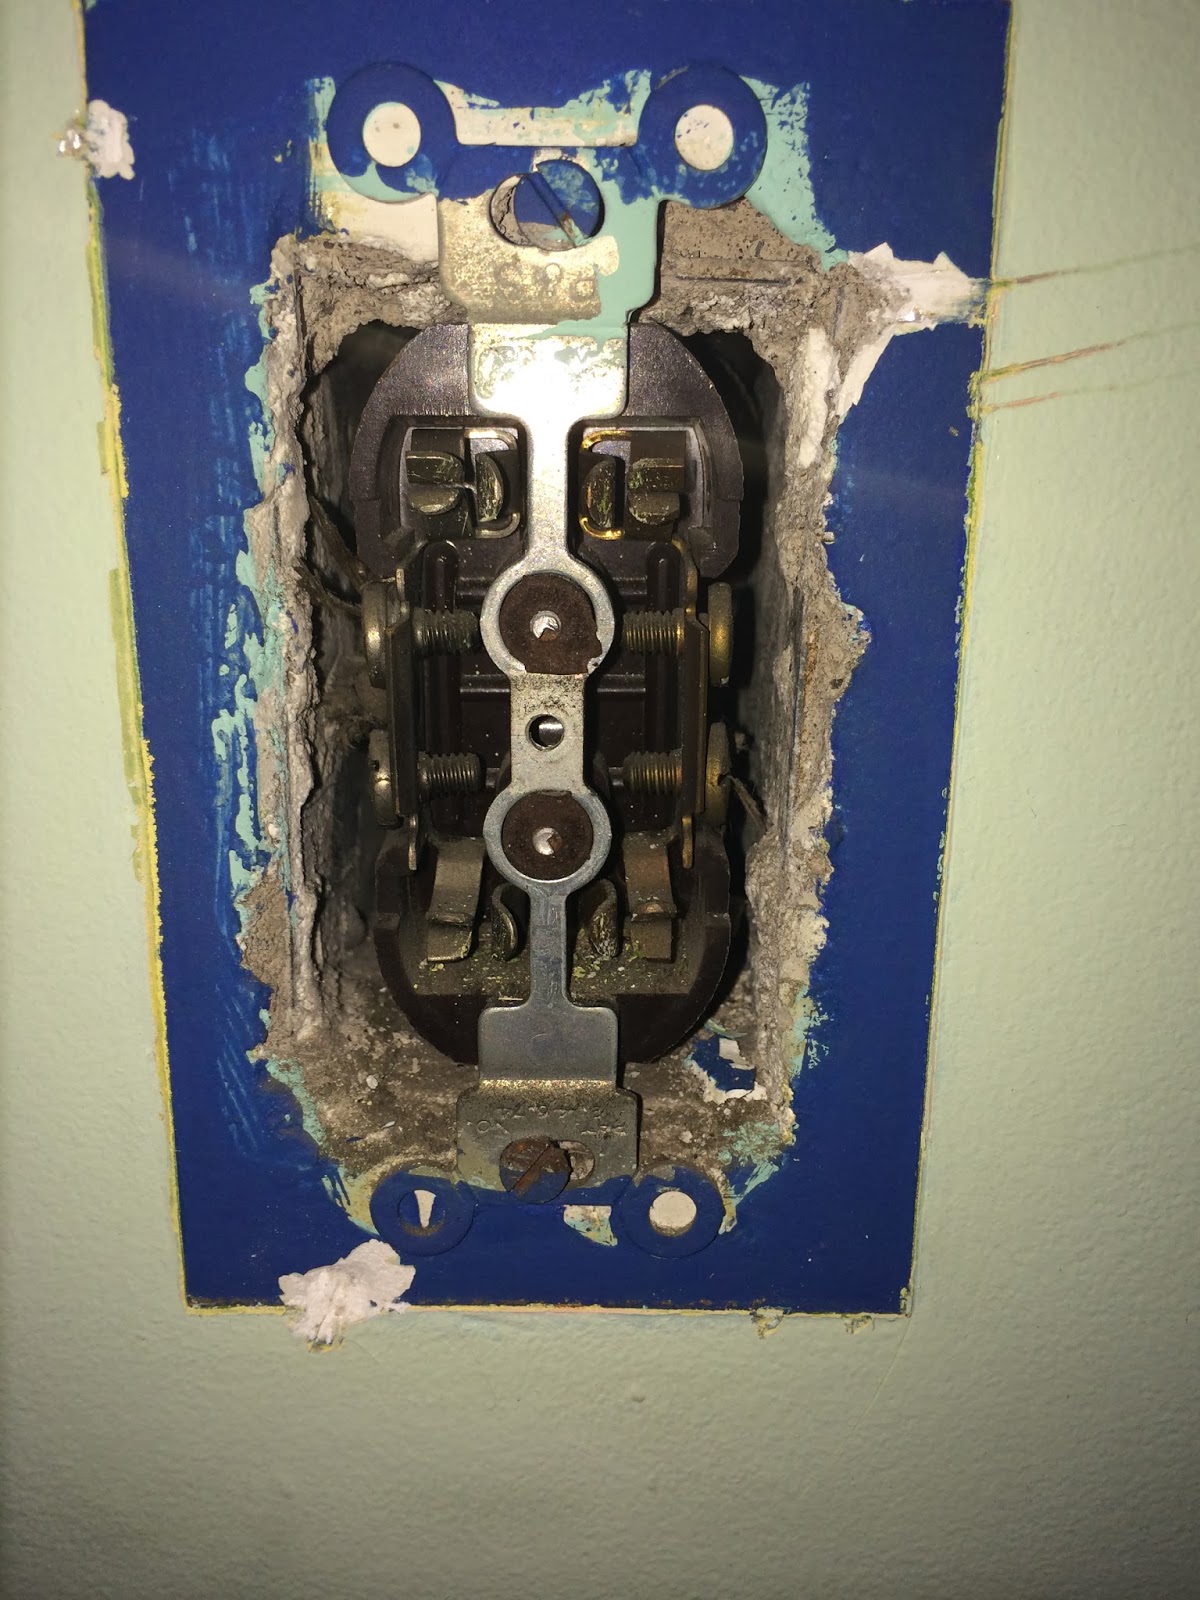
No, I didn't zap myself but it's shocking what a difference this simple update makes. Before I did anything else, I decided to update the light switch, outlets and covers in the room. The originals were brown or black and the outlets didn't have a hole for grounded plugs. The outlet covers were painted over which sealed them to the wall. I had to get a screwdriver behind it and pry it off.


When I tried to pry the next cover off, it broke the outlet completely.


The light switch was an old mercury type and the light switch cover...well, grandma got her hands on that one.

The black switch just looks like a dark hole in the middle of the cover.

I grabbed a pair of pliers, Phillips and flat head screwdrivers, and borrowed a Receptacle Tester from dad (which is a great tool to add to your electrical arsenal. I plan to get one of my own.) I picked up 4 new outlets and a new switch at Lowes. I also grabbed a box of 50 Grounding Pigtails at Home Depot for $16 (enough to do the whole house.) . Once I had all my supplies and I shut the power off, I was able to get down to business. Keep in mind I'm not an electrician but a home wiring guide from Home Depot is a good thing to pick up and read to get a basic understanding before doing anything around your home.

Replacing basic outlets and switches is relatively easy. First MAKE SURE THE POWER IS OFF! Then, take off the cover and remove the 2 screws holding the receptacle to the electrical box inside the wall. Pull it out of the wall to expose the wires attached to the receptacle. Remember that the white wire always goes to the silver screw and the black wire goes to the brass screw. Black to Brass will save your ass! It was easy to pop them off the old outlets by unscrewing the brass and silver screws and putting them onto the new ones. Since the new outlets have the ground prong hole, they needed to be grounded properly. The grounding pigtail goes to the green screw on the outlet and the other end of the pigtail gets screwed into one of the holes in the back of the electrical box in the wall. The box is already grounded so this just connects the outlet to the box to ground it. It's important to remember to wrap the wire clockwise around the screw so when you tighten it, it doesn't end up pushing the wire off the screw. When the outlet is rewired and screwed back into the wall, plug the receptacle tester into the outlet and then turn the power back on. The tester will tell you if you have wired your outlet properly by displaying pairs of lights. Match the lights with the guide on the tester. If something isn't correct, it will tell you how to correct it. Obviously Grandpa didn't have a receptacle tester because the only outlet he updated in this room since the house was built (for the air conditioner) gave me error lights. I fixed that one while I was at it.

Once everything was all finished, I put new covers on. I picked these up at Lowes when I got the outlets and switch.

Again, unsure why Blogger keeps graying these out, but they are white.

I'm so happy with how these look. I know they're just outlets and a switch and they'll all be behind the furniture but it makes the room look so refreshed and updated.


A great, inexpensive way to update a room!

Friday, February 7, 2014

House Tour - Kitchen, Bathroom & Master Bedroom

Did you look into the kitchen in the last post? I told you to save that so-sweet-it's-sour eye candy for a dedicated post and here it is. Behold the kitchen in all it's pink glory!

The kitchen cabinets were a wedding gift to my grandma from her mother.

I'm not sure why the oven is open and the light is on...

Before these appliances, there were avocado green ones but I'm not sure what was there before that.

There was a stainless steel sink before this one. More Precious Moments on the shelves here. The door on the left leads to the back yard.

The lower cabinets have pull-out slider shelves. Very ahead of the times! The narrow cabinet on the right has a slide-out towel bar.

Grandma intentionally had the soffit made shorter than the cabinets. She definitely had a vision. She used an old wooden cream cheese box like the one below and covered it with wallpaper to use as a built-in planter.
This room was rewallpapered on 10/27/1978 with the paper you see here. Before this was a geometric 3D square patterned paper. 


She's a fan of Raggedy Ann and Andy and this is just where SOME of the collection lives.

This side of the kitchen next to the fridge has more slide out lower cabinets. The center cabinet has a shelf that swings out and up & locks at counter height which holds the mixer. I forgot to take a photo of the insides of the lower cabinets. 

She has an interesting way of storing her dishware. but she doesn't use it much so it's not inconvenient to keep it this way.

Some more Raggedy Ann stuff and her handpainted eggs. She did a lot of ceramic work and was very skilled with a paintbrush.


She had always wanted a range hood but grandpa installed this exhaust fan instead. She hates it. She kept the circular cutout from this fan which is what I scanned to to make the background of this blog so look to the left or right to see the countertop and backsplash detail. The door on the right of the fridge leads to the basement.

The floor is standard linoleum floor tiles and the star was custom inlaid from larger pieces of the same kind of tiles.


Now we can head back down the hallway and check out the bathroom.


While I'm not fond of the colors in here, I do love this bathroom. I think the tub is so cool and the room is large for a 50s bathroom. 


Two of the things I hate most about this room are the lighting and the mirror but the mirror is probably what makes the room feel so much more spacious. I hate fluorescent lighting with a passion along with the weird floating soffit that contains the light.  


The built in linen storage is great. The bottom cabinet has a laundry chute on one side.

Now the last room on this floor, the master bedroom.


SO...MUCH...PINK.

The Case between the door and the closet is Grandma's dollhouse. She made it in the 70s. I'll post pictures of that someday.


Hope you enjoyed the first floor phase of the house tour! I still have to take photos of the basement where grandma lives now and the second floor bedroom and attic space which is currently a mess.